How to Install Modern Pergola Rafters Without Brackets
If you lot have your pergola posts in, your pergola frame installed, and your pergola rafter lumber stained, you're probably set to motility onto finishing up your wood pergola past installing the rafters. In this tutorial, we volition show you how to install pergola rafters quickly, relatively easily, and inexpensively – without brackets.
 View in gallery
  View in gallery
 Metal brackets are a pop and excellent material to use when building a pergola. The brackets are graded for outdoor use, and they hold the lumber in identify securely and safely. All the same, considering brackets are required for utilize on each end of each board, they practise not provide a clean, mod aesthetic.
 View in gallery
 Of class, structure isn't all about artful entreatment – you want the finished product to be as safe and secure as it is stylish. That's why this method is a win-win. The installation of each rafter is fast, the connection is secure, and it will concluding as long as the subclass method…but for much less price.
 View in gallery
 Before y'all begin installing your pergola rafters, you're going to want to find middle on your perpendicular frame boards.
 View in gallery
 If you accept a center beam, as this pergola does, you'll want to detect middle on each side of the beam. Unfortunately for the states, our center axle boards are a bit bowed. This will be a problem if we effort to install rafters to a center beam that'due south not straight. So, our first order of business is: straighten the heart axle.
 View in gallery
 At the center point on the wall-mounted frame boards, we chop-chop installed a (temporary) screw eye. Tip: To install a screw heart, only become information technology started into the lath with your hands, so use a screwdriver through the eye to tighten it. We chose the center betoken because we volition be installing our center rafters first, and the rafter will completely cover the screw eye pigsty one time the eye has done its task and is removed.
 View in gallery
 Once the screw eye is fully secure into the center of the wall-mounted frame, you can hook one end of a ratcheting strap into the spiral middle.
 View in gallery
 The other end of the ratcheting strap will loop twice (it'south but shown once here, but you'll want to practice twice) around the center beam, just slightly off-center, so hook to itself. Exist sure y'all're non wrapping the strap around the part of the beam that the rafter needs to connect with.
 View in gallery
 The setup will expect like this. Now begin ratcheting the strap tight, which will pull the center axle straight. You lot're going to need to watch this heart beam closely; you don't want to overtighten, as that will cause the opposite problem. Don't be afraid of a little creaking or complaining of the wood when you tighten this up.
 View in gallery
 You can see hither how the center beam is completely straight now.
 View in gallery
 Hither's a meridian(ish) view. The ratcheting strap will hold the beam until the offset rafter, on the right-side section hither, is installed.
 View in gallery
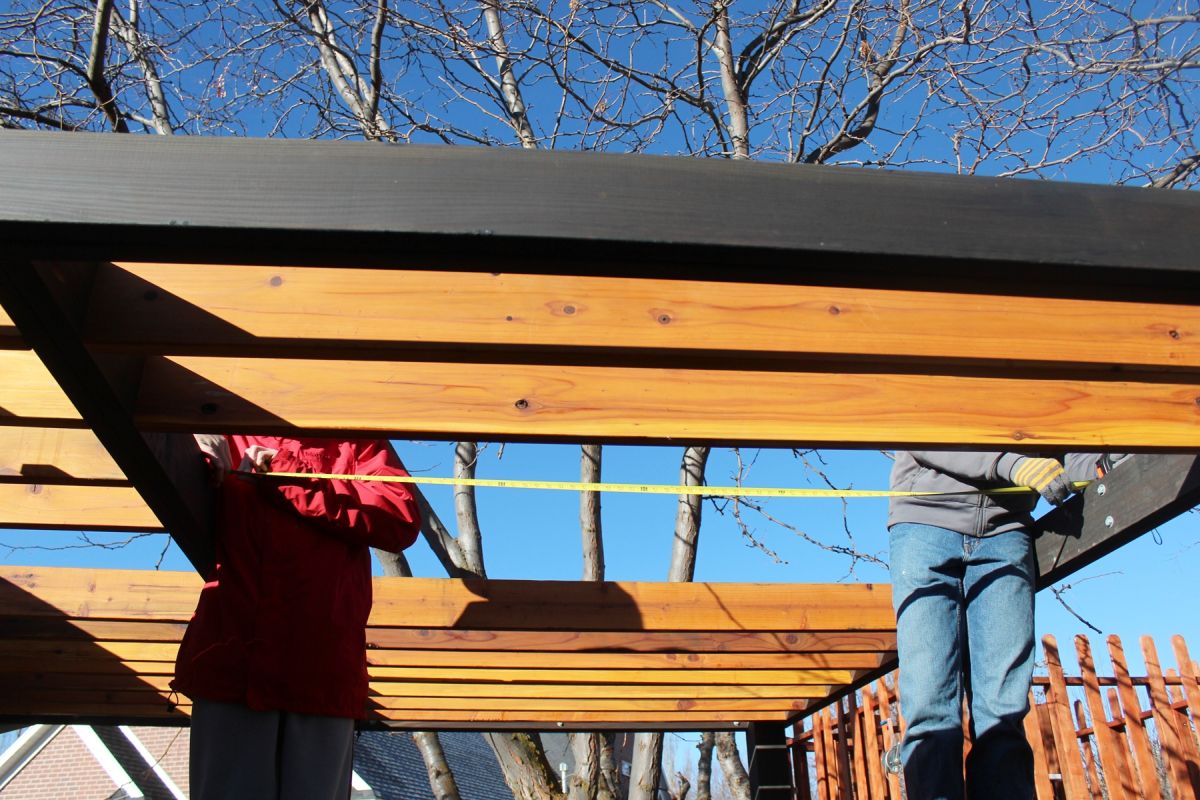
 Measure, at your center marks, from the within edge of your frame to the inside edge of your center beam to determine the length of rafter y'all need. Marker, then cut this length with a miter saw.
 View in gallery
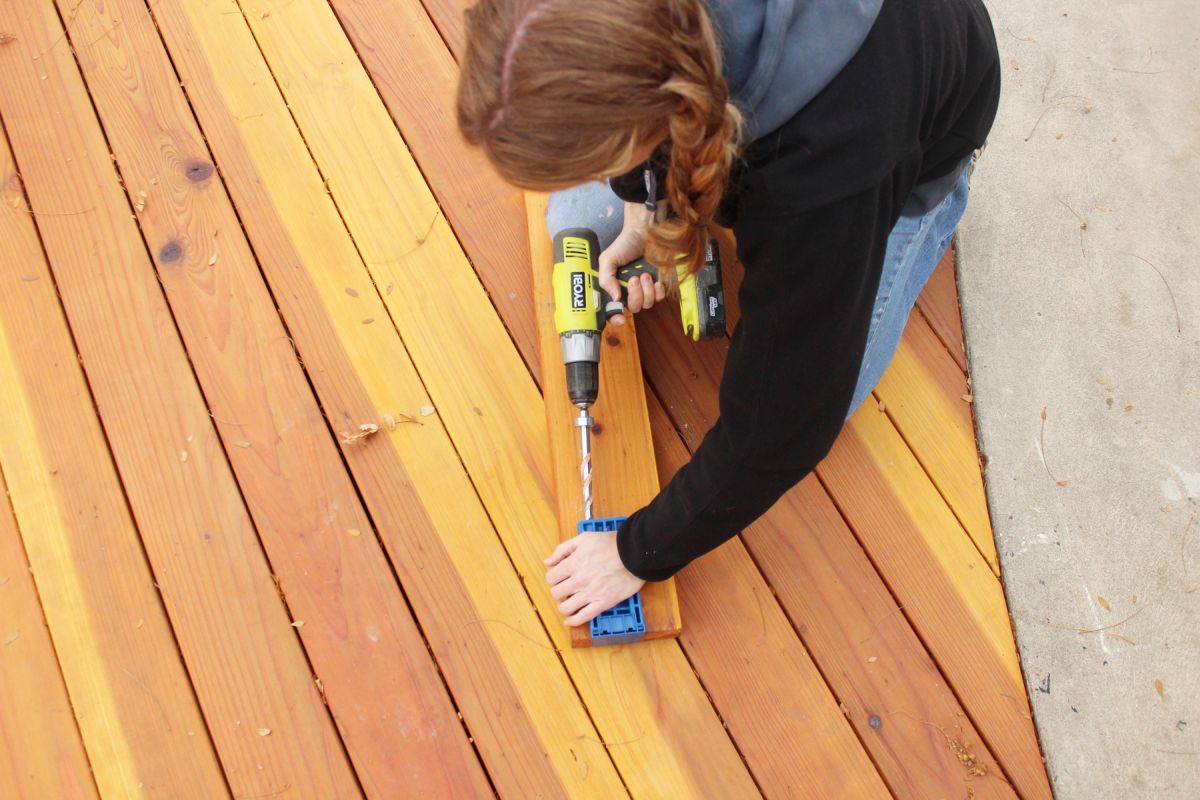
 You are going to use the Hd kreg jig to drill two holes per end on your rafter board. Tip: This is hard to practise alone. The jig is going to want to kick out from under you lot as yous drill.
 View in gallery
 Have a helper identify his/her foot up against the cease of the Hard disk drive kreg jig to concord it against the end of your board.
 View in gallery
 Press down firmly with one arm as you drill your pocket holes. This secures the Hard disk jig into identify, both from the end of your lath and onto the face of your board.
 View in gallery
 Drill 2 pocket holes, each nigh 1" abroad from the sides of the lath, onto each end of your rafter. These pocket holes should share the aforementioned face up of the board so that one side of your pergola rafters looks similar they're floating.
 View in gallery
 Grab your right-angle kreg clamp for the end of your rafter that yous're connecting to a floating frame board.
 View in gallery
 At the center mark (these should be marked as lines on the top of your frame boards), with your pocket holes facing the "back" side of your pergola, utilise the correct-bending kreg clamp to hold your rafter board in position. Using Hard disk kreg screws (2-1/2" heavy duty pocket screws that are rated for outdoor employ), attach your rafter to the frame.
 View in gallery
 Tip: Later on you've screwed in i Hard disk kreg spiral, remove the clamp. Employ a level or a right-angle triangle to determine how perpendicular your rafter is. You might be surprised that eyeballing it can be quite off from square (at least, I was surprised), depending on what other factors play into your peripheral vision. Square up the board, then install your second Hard disk pocket screw.
 View in gallery
 Repeat the process for the second side of your start center rafter, making certain everything is square and level and affluent.
 View in gallery
 Tip: Hopefully everything will align perfectly, just if you have to cull, line upwardly the lesser sides of your rafter + frame boards, as this is what will be visible. The top part of your pergola won't be all that noticeable, in full general. Use a scrap board and hammer to create a flat connectedness on the bottom ends of your boards, if necessary.
 View in gallery
 Here is a photograph of the first middle rafter fully installed. Those HD pocket screws are so stiff; this rafter is every bit sturdy as can be.
 View in gallery
 Retrieve how your pergola still has the ratcheting strap attached to its center beam? When this strap is removed, we noticed that the center beam pushed yet outward ever so slightly, which afflicted the precise straightness of the outside frame boards besides. So, to maintain a straight center board until both heart rafters were installed, we merely removed the screw eye from eye and repositioned it 10" (at the adjacent rafter placement), and repeated the ratchet strap attachment and tightening until everything was straightened upward once again. This allowed us to hands install the second center rafter onto a squared-up frame and center beam.
 View in gallery
 Here, both eye rafters take been installed, and the ratchet strap is set up to be removed for practiced.
 View in gallery
 The center beam is perfectly directly afterwards the strap is removed, which means the outer frame board is directly as well. Everything is square, which is the perfect position from which to movement frontwards in installing the rest of the pergola rafters.
 View in gallery
 From the center marks of all perpendicular frame boards (including the center beam), we used a simple ruler to mark 10" spaces, as our rafters were to exist installed at ten" center-to-centre.
 View in gallery
 You can see, from this "forepart" view of the pergola, that the rafters are seamlessly continued to the framing. We love the floating, minimalist look, peculiarly when the ii-tone pergola provides enough visual activity.
 View in gallery
 Now that your center rafters are installed, you will follow these same steps to install the residuum of the rafters. Work from the side of the rafter that has the pocket screws for easiest installation.
 View in gallery
 Hither, you can run into how all the pocket holes line up, visibly from 1 side. The aren't actually that noticeable, especially up high on your pergola. Nonetheless, the insides of the pocket holes will demand to exist stained afterwards on for forest protection.
 View in gallery
 And here is a view of the "floating" slats. Nosotros recommend that you install one or two rafters on 1 side of your center beam, then switch sides and install one or 2 on the other side of eye, rather than installing all the rafters on one quarter of your pergola earlier moving to the other side. This will ensure that everything stays in line and on track.
 View in gallery
 Later on you've completed installing the rafters from your middle rafter'southward pocket pigsty side to the outer frame, you'll notice that yous're halfway done. As long equally the rafter positions have been conspicuously marked on the tops of your frame boards and center beams, you can jump to the height of your pergola and begin installing rafters from the outside in (toward center).
 View in gallery
 It's not impossible to install the rafters with the pocket holes on the inside (which is why 10" or greater spacing is important), simply information technology's much easier to work in a larger infinite that a bigger air gap provides.
 View in gallery
 So don't feel like you accept to work in the direction of eye rafter outward. This isn't necessary. Once the heart rafter is installed, practise whatever works best for you with the other rafters' installation direction.
 View in gallery
 Here, y'all can encounter that we'll eventually accept simply a 10" air gap to work in on the rafters closest to the center rafter
 View in gallery
 But for the installation of all other rafters on this second half of the pergola, we'll have enough of room to move effectually in. This is helpful for measuring, marking, fitting the board, leveling it, clamping information technology, and ultimately screwing it into place.
 View in gallery
 Y'all're going to desire 2 people up on ladders, ane on each terminate of your rafter boards, at all times. Because there are no brackets in identify, this method requires that 1 person securely holds i cease of the rafter while the other terminate is being installed. It's definitely not a one-person installation opportunity.
 View in gallery
 When all the rafters are installed, take a minute to step back and enjoy the results of your hard work.
 View in gallery
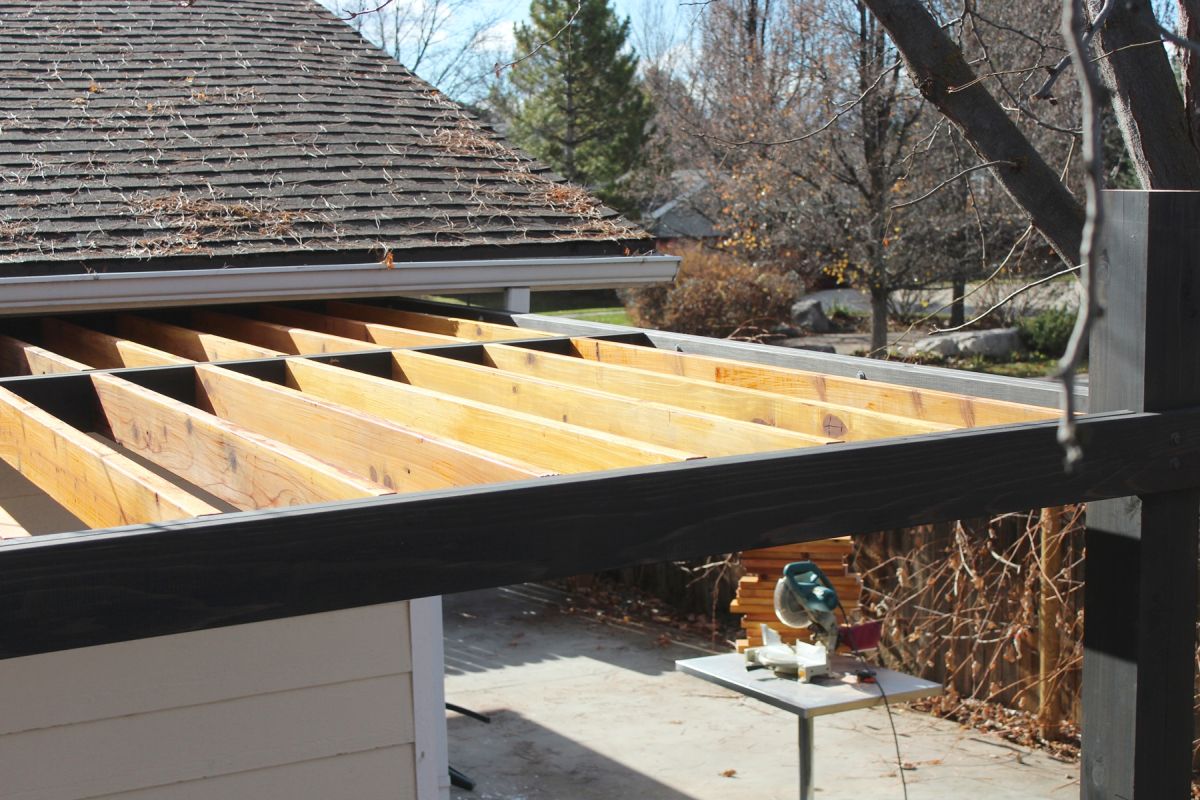
 With 2×6 redwood rafters, spaced 10" apart, in that location is plenty of shading opportunity while yet providing a nice view of open up sky, which makes pergolas so distinct (and, arguably, preferable) from completely covered patios.
 View in gallery
 Be sure, as you're installing the second rafter of each line, that you align the rafter ends to create a "direct" line, even though it's really two rafters separated by a center beam.
 View in gallery
 If, for some reason, a rafter ends up being installed 1/4" off its center marking (hey, things like this happen in real life, correct?), it'southward probably more important to endeavor to align the second rafter end with this slightly off-center 1, or at least separate the difference, than information technology is to perfectly marshal the second rafter with the centre mark and have a visual "split" between the two halves of your rafter line.
 View in gallery
 When you compare this straight middle axle with the bowed, curved original, you volition see why it's so important to go that taken care of from the very beginning of rafter installation. Don't think that your rafter boards themselves will straighten out a doubled-up center axle.
 View in gallery
 Afterward, nosotros volition be taking off the tips of the pergola posts and capping them and then they don't not bad or split up, but for now, the pergola posts extend up most a human foot or so from the tiptop of the pergola. If you similar this look, consider your pergola piece of work done.
 View in gallery
 The two-tone nature of this pergola is 1 of our favorite features. Y'all'll discover that at that place are no cross-boards (slats) on top of the rafters, as is sometimes the instance with pergolas. This is because we wanted a make clean, streamlined, and minimal look for this contemporary pergola, and the 2×6 rafter size provides plenty of shade potential without having to add another layer of visual busy-ness.
 View in gallery
 Even against the firm, installed onto the wall-mounted pergola frame, the blackness and the natural stains look well together.
 View in gallery
 While ii-tone piece of furniture and compages has been around for a very long fourth dimension, it is every bit as relevant today as it was in decades (or more) past.
 View in gallery
 Of course, a monotone wood pergola is beautiful in its own correct as well. In all black, this pergola would make quite the dramatic argument.
 View in gallery
 All these slats, if they were stained black like the pergola frame, would appear to exist a solid roof, at least from certain angles.
 View in gallery
 Yous can see here the final outcome of the pocket holes, visible from the dorsum side of the pergola but not terribly noticeable. Much less noticeable than metallic brackets would exist, which was what nosotros ultimately wanted.
 View in gallery
 Nosotros promise you found this tutorial on how to install pergola rafters helpful. As an FYI: Many people refer to the principal pergola boards as rafters (as we have done in this tutorial) and to the perpendicular shade boards often placed on top of the rafters as slats (at that place are none of these in this tutorial). Others refer to all the boards as slats.
 View in gallery
 Either fashion, enjoy finishing upward the top of your pergola. It'southward a beautiful feature that volition add immeasurable value to your life and to your dwelling house.
Source: https://www.homedit.com/pergola-rafters-without-brackets/
0 Response to "How to Install Modern Pergola Rafters Without Brackets"
Post a Comment